This is not really magic or mentalism related, but since computer software can sometimes seem to require arcane incantations – tech folks aren’t called “computer wizards” for nothing! – we’ll consider this a special kind of magic for now. I searched online and found little helpful information on this topic; I solved the problem and am sharing it here so that others may benefit.

While moving my wife’s work information from one laptop to another, it turned out that instead of capturing email addresses as individual contacts, she had somehow simply added them to distribution lists instead. When moving the contacts from one computer, the import function only wants to bring in actual contact records. She had several distribution lists with dozens if not hundreds of email addresses, but no actual “contacts.” The individual email addresses entered in a distribution list are not saved as contacts but rather are just saved with the list.
This initial problem was easily resolved by exporting the lists to Excel and importing them as contacts from the spreadsheet. These were minimal contact records – name and email addresses. One little hiccup I encountered was that when importing the Excel spreadsheet, I failed to provide a header row. This meant that the first contact in each group was not imported. No problem; I just created those contacts manually, then created distribution lists from the contacts, and figured I was done. Until I noticed something.
The Puzzling Nature of “Company (None)” Contacts
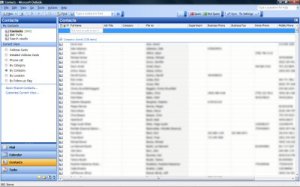
When I looked at the list of contacts in my wife’s brand new contact list, I saw that they had been sorted into two groups. One group, containing all the records I imported, was categorized as “Company (None).” Obviously the software was trying to group and present the contacts sorted by company name, and none of my records had anything in that field.
Strangely, though, there was another group called “Company (None).” This second group had all the records I had entered manually.
I could not drag records from one group to another. I was puzzled and searched online. Turns out this is a known issue, and it has to do with the way Outlook populates empty fields when importing records versus creating them directly. The workaround suggested was to go into each record, add a bogus company, then go back in and delete the company name. This would eventually put all the records in the same kind of “No Company” group, and all would be well.
Except for the obvious problem: who wants to do that for all those records? Not me!
Here’s the simple solution.
First Task – Identify which “Company (None)” group you’ll be changing.
- Open any one of the records from either group.
- Change the company to a placeholder name – ABC.
- Look at your list – make sure it’s showing that ABC company as a separate grouping.
- Now go back into that record and delete the company name.
- Check to see which “Company (None)” group that record ended up in. That is your target “Company (None)” group – we’ll call that the TCN group. The other will be our source “Company (None)” group – we’ll call that the SCN group.
NOTE: The SCN group may or may not be the same group you started with; the process above just lets us identify the group we are going to change.
Second Task – Change all the records with an easy drag-and-drop procedure.
- Open any record from the SCN group.
- Change the company name to ABC.
- View the entire list and make sure you can see the new ABC company.
- Select all the records in the SCN group and drag them to the ABC company group. The SCN group will now disappear as it is empty.
- Now select all the records in the ABC group and drag them to the TCN group.
Congratulations – all of your “No Company” contacts will now be listed in the same “No Company” group!


7 Responses
I had the exact same problem with Outlook 2010, and this procedure worked like a charm to fix it! Thanks!
Simple after you do it. Awesome Thanks
love it when someone posts a quick solution and I dont have to spend time trying to figure it out myself!! Thanks!! Worked pefect!!! 1000 contacts, this saved me.
Thanks! Easy if you do it!
Amazing…It is easier to Google the solution than try to use the stupid Outlook Help!!! Thanks!!!
I am new to Outlook 2010. I could not figure out WHY this was happening. I spent hours watching tutorials and never found the reason….until I read this! Thank you so much! You Rock!
thank you so much for this quick fix and taking the time to write it up so clearly! awesome!!